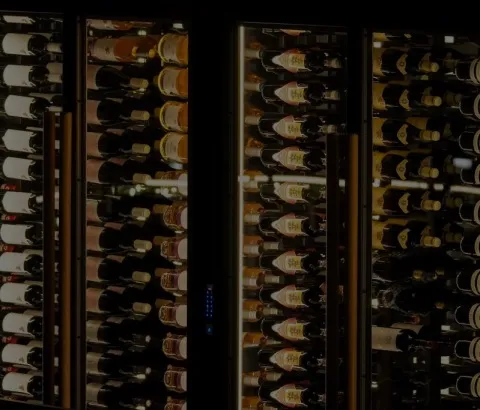
The Peltier Effect is the principle that underlies thermoelectric cooling. This happens when you pass an electric current between two electrodes, usually ceramic. The electrical current creates a temperature imbalance in the device. The device gets hot on one side and cold on the other. The Peltier is found in the cooling unit of a thermal wine cooler. This large device has a fan attached and aluminum fins. It works as a heat pump, removing heat from the unit to keep the air cold. This device stops cooling, and the temperature of the wine cabinet gradually rises to room temperature when it breaks down. They don't fail often because they are simple and have few moving components. It's good to know they're simple to fix when they break. This entire process can be completed within 10 minutes. Follow the instructions.
Call us
To replace your thermoelectric wine refrigerator cooling kit, you will require A Replacement Kit, Electrical tape/Heat shrink, & Torch.
Remove the back panel and unplug the unit. There are 13 screws along the top, sides, and bottom of the unit, plus an additional three screws set under the unit. Place the screws safely in a container like Tupperware or a coffee can. Pull off the back cover and put it aside once the screws are removed. You can check which cooling kit has a problem by plugging the cooler into the wall and touching each cooling unit. They should have a spinning fan and feel warm if they are working correctly. If the fan is not spinning and feels fantastic, there's a problem. If neither kit is warm, wait a few minutes before checking again. You should give them some time to warm up. The cooler's temperature can be lowered to speed up the warming process. Unplug the cooler once you've found the replacement kit.
WhiYou can unscrew two screws on either side of the cooling kit. They're hidden among the aluminum fins. Use needle-nosed grips if your fingers are too short to reach and pull out the fins. Once the pliers are out, you can slowly remove the cooling kit. Please do not pull the cord connected to the cooler. Unplug the cooling set cord and put the cooling set on the table. The kit can still be attached to the cooler using a set of wires. These are the NTC1 cables, fan cables, and power wires. These wires should be bundled using zip ties. The wires will be unraveled after you cut the zip tie. Unplug the NTC1 Cable and Fan cable. The power cables will be hardwired directly to the cooler.
With the wire cutter, separate the NTC1 (black and red) and fan wires. Place the cooling kit aside and pull out the cooling kit. With the wire strippers, remove the protective plastic from the end of the power cords on the wine cooler and the new cooling package. The latest cooling kit can be inserted into the cooler after the exposed wires. Connect the cord on the backside of the cooling unit to the same cable you unplugged after removing the older kit. Assemble the new kit, ensuring all interior wires are safely tucked in and not blocking the fan. Don't screw the second one in until you've tightened the first. Otherwise, you could have an uneven surface. Once the second screw is in, compress if necessary. Once the splice is in place, it will be easy to attach the power cable.
The power wires should be twisted together in the same color order: black to red and red to black. You can use electrical tape to cover the exposed wires so that no metal is visible. Heat shrink is a great option. Slide the cylinders on the cables above the uncovered metal. Then, tie them together. Slide the heat shrink down to cover the exposed wires. The heat shrink will shrink when heated. Before moving on, make sure they are secure.
Connect the NTC1 at the top left corner, where NTC1 is written. Plug the fan back into the bottom-right corner of the circuit board where it says FAN. The fan wire is black and red. The NTC1 cable is black. Now, the new cooling kit has been installed. Plug in the wine cooler and check that the cooling kit is working before you attach the back panel. The kit should feel warm, and the fan should be spinning. Screw the cooler's back panel on if it is warm. Do not forget the three screws on the bottom. Once the panel is secured, you're done. Time to enjoy your wine!